Step 1.
Cut two fabric pieces that are four inches by 20 inches. Narrow hem one of the long edges as shown.
Step 2.
Measure two inches from edge and mark with a pencil (see the dot jus above the 18). Now measure one inch from that point and mark again (ring finger is pointed at this dot). Again mark two inches from your last mark and then an inch from that point. Repeat this all the way across. (2 inches then dot- 1 inch then dot- 2 inches then dot- 1 inch then dot- Continue in this pattern until you come to the end)
Step 3.
To make pleats take the first mark you made and place it on top of next mark which should be one inch from your first mark. Repeat this all the way across pinning each pleat as you make it.
* This is what it will look like when you have pinned all of your pleats
Step 4.
Stitch across top of pleats as shown.
Step 5.
Pin edges together as shown on each of the short ends and sew across. Turn to outside and press. I like to add in a little spray starch before pressing- but then I starch everything!
* This is what your end pieces will look like after your quick stitch across.
Step 6.
Pin some wide ribbon to top of your fabric as shown below. Sew acoss the ribbon (both at the top of your ribbon piece and at the bottom to secure tightly).
Step 7.
Pin the ribbon side to the bottom of the cuff of your rubber glove. I like to turn under (about an inch or so) the rubber glove as I am pinning- just to give the rubber a little more stability. But this is completely opinional.
Step 8.
Stitch into place.
Tada! All finished and suitable for gift giving. You don't want to be the only one that looks smashing in a pair of rubber gloves. Right?
Ohhh! I almost completely forgot! Remember those pair of red gloves I was talking about earlier with the ghastly yellow cuff?
Not any more ... and it was just so ~sew~ easy!
DIY ~Sew~
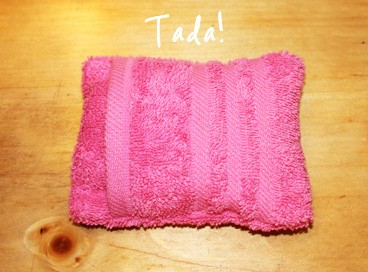
Easy Peasy Soap Pouch
Cut up some old towels for yourself or purchase some inexpensive hand towels (or a large bath towel will make several) to give as gifts.
Each pouch will need to be cut 5 inches wide by 12 inches long. This will fit a bar of Dove soap quite nicely (which is my next best favorite soap- my homemade goats' milk soap being my absolute favorite!)
Fold over the left side 4 inches.
Then fold over the right side (on top of the left side) … a total of 3 inches. * This will give you a pouch that is approximately 5 inches by 5 inches.
Turn towel around long ways and Sew a Seam down both sides - this will close up all of your sides so the soap stays securely inside. * Make you you turn before stitching or you'll sew up you pouch opening.
Turn inside out
Insert your bar of soap and pull the little flap over it.
See how nice the 12 inches x 5 inches size worked perfectly for the Dove Bar?
TIPS!
! Wrap in a bow and give as gifts.
! Add a Handle- cut a piece of towel 4 inches wide by 5 inches long. Double over to create a piece that is 2 inches wide by 5 inches long. (this gives you a nice weight for a sturdy handle) Sew each end to the finished pouch- be sure and stay close to the edge seams of the pouch. When adding a handle I like to back stitch several times to make sure the handle is going to stay secure through repeated use and washings.
! Washes up nicely for repeat usage. Just throw it in with the laundry
! Enjoy the experience knowing you did it yourself and it was ~sew~ easy!
Repurposed Bath Towel- To Pouf Pad
This is so easy to make using just an old bath towel. Follow along and you'll soon find yourself making loads of these!
What you do, is cut about 1.5 inches off one side of towel (to get that finished edge), and two circles out of the towel. Use a lid, jar (well really anything round will do) to give you a trace pattern for your nice round circles.
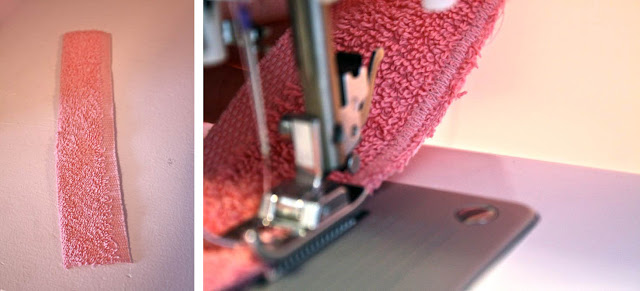
Then sew a long straight stitch on the raw edge of the two strip.
Next you are going to ~gather~ your fabric.
To make a ~gather~ of your fabric piece you can do it one of two ways:
Method 1. Set your sewing machine tension to the to the loosest and longest length of stitch. In other words: set your machine to a really wide straight stitch width (or basting stitch). Then begin sewing- making sure to leave a good two inches of thread on the beginning and the end of the fabric. Then gently grasp the fabric with one hand and with your other gently begin to pull the thread to make your fabric bunch as seen in the photo.
TIPS!
I like to make two lines of stiches (one directly below the first) This helps if the first thread breaks- you'll have a backup stitch.
It's important to not back thread your stitches either at the beginning or the end or you'll end up with a big old mess and have to start over.
Method 2. Using a normal Zig Zag stitch on your machine begin sewing slowly while gently pulling the bottom (bobbin) thread to gather your strip. The secret here is to not get in a rush or you'll end up breaking the thread.
Next: Sew it onto one of the circles in a spiral shape, starting on the outside (see above photo).
Next: Cut a 1.5" x 6" strip, and finish the edges with a tight zig-zag stitch.
Next: Pin the two circles together, with your 7" strip laid across the bottom.
Sew a tight zig-zag around the two circles, sewing right over each side of the strip on the bottom.
Lastly; Trim off the excess edges of your fabric handle to match the circle edges!
FRONT
BACK
There. All done! And it was ~Sew~ easy!