The Beginning of all crochet
 |
| Completed: Pink and Off White Single Crochet Afghans |
First Row - Step 1 - The Train
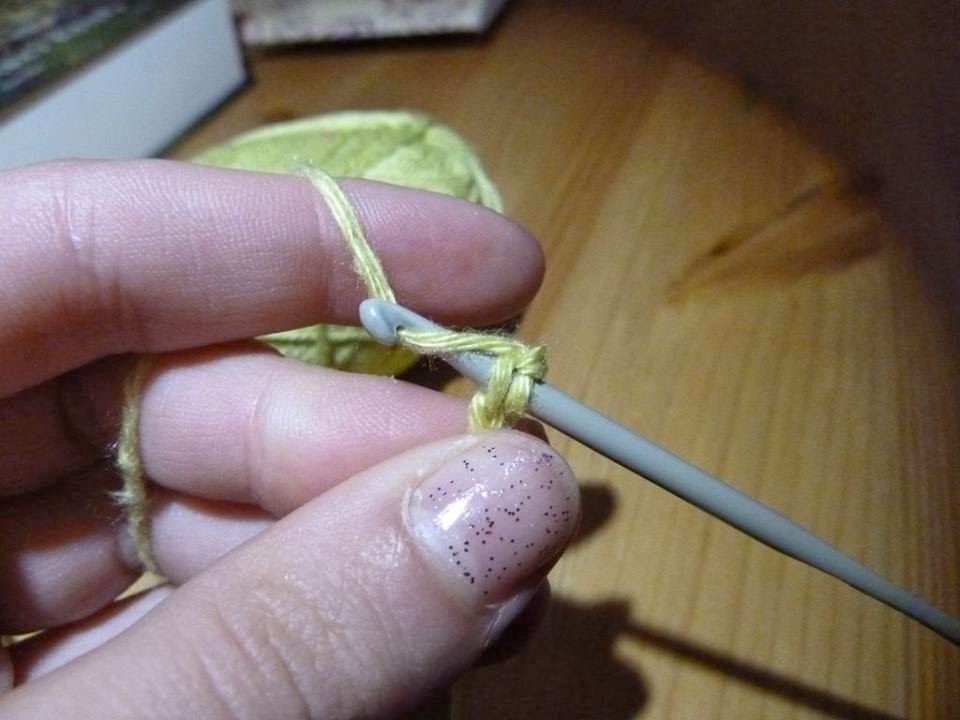
Pulling out a piece of the yarn ... Wrap yarn around the hook to create an O that is only as big as your needle is around - and leave a little tail piece. Tie in a firm knot.
* You'll see a lot of videos on the internet that show a crocheter making this little fancy beginning stitch- which is fine as long as you tie that stitch into a firm knot so that all of your hard work doesn't become un-raveled the first time you wash it. I often double knot mine. Just to be sure.
 |
| Step 1 |
 |
| Step 2 |
Step 2-
Wrap yarn around needle one time and pull through the beginning O stitch. Continue to wrap the yarn one time around your needle and pull through - which creates a new O (stitch) every time you do this. Counting each time you create a new O until you have 145 of them. Now you have a long train of O stitches.
* A nice size afghan is about 54 inches wide = 145 O's stitches on a train.
 |
| Step 3 |
 |
| Step 4 |
 |
| Step 5 |
 |
| Step 6 |
 |
| Step 7 |
Second Row- Step 1
After you have made 145 O stitches- Turn your train around (flip it over) and start on the 2nd row going in the opposite direction.
Step 2- The Single Crochet
In the center of each of the O stitches in your train (beginning with the first one and going one at a time until you get to the end of your train) insert your hook through the hole and wrap the yarn over the needle and pull the yarn through the hole. You will see that you now have two loops on your hook. Wrap yarn around again and this time pull the yarn through the two loops on your hook. Move on to the next O stitch and repeat until you get to the end of your train. Then turn your train (flip it over) and start all over again going in the opposite direction.
* Continue until the blanket is as long as you want it to be. I like to cover my feet when I am watching TV as well as my shoulders- so every now and again when my blanket is starting to get big I will stand up and hold it to my shoulders. If it covers my feet on the floor then I know my blanket is long enough and it's time to quit. If it is a blanket that I just want to throw over my couch or at the foot of the bed then when the blanket is as long as it is wide then it's done (in other words- a square).
 |
| Step 1 |
 |
| Step 2 |
 |
| Step 3 |
 |
| Step 4 |
 |
| Step 5 |
Step 3- Finishing the blanket to make it even.
Remember that little tail I had you to leave when you first started your O train (Row 1 Step 1)?
Starting there - go all the way around your blanket using the SINGLE crochet stitch until you end up back at the tail. You can go around your blanket once, twice or three times - whatever you want. This just gives the blanket stability and helps to keep it nice and even. Once you have gone all the way around the blanket (ever how many times you wanted to) you can just snip off that tail and you're done. You can make big blankets, baby blankets or even a scarf using this same train and stitch. It's all up to you! Remember; a pretty blanket is more in the colors you use than it is in the stitches you use. Variegated yarn (yarn already made with different colors built in) takes the guess work out of what colors will match well together- but I like using my imagination when mixing colors- but honestly; a solid one color afghan that matches my couch or my bed or whatever is probably my favorite.
* If you want to change color yarn then at the side of the blanket - cut your yarn off so you have a tail about 1/2 inch long. Take your new color and tie a firm knot to the tail of the old color yarn (joining the two pieces together) Crochet a couple of stitches- then go back and tie another knot in the two tails (this is just for safety and because I am a double knot kind of girl) Then close to the knot- snip the two tails of yarn off. Don't worry about the knot you made. As your afghan gets bigger- the knot will naturally slip inside the surrounding yarn and disappear.
That's it. You now know how to start an O train, how to Single crochet and how to Finish off a blanket. Happy Crocheting!
TIP!
Here is a couple of videos to show you how it's done. At the beginning they show you how to make that fancy O stitch at the beginning- just remember to tie it in a firm knot!
https://www.youtube.com/watch?v=FGemgS1ldwg
(normal speed)
https://www.youtube.com/watch?v=tGMjqo8jAvs
(slow motion)
(slow motion)
No comments:
Post a Comment
Note: Only a member of this blog may post a comment.